

The InSight Peep lenses are not your ordinary lens. In fact, each lens is made of top quality optical glass specified to tight tolerances and critical parameters to ensure the best optical quality.
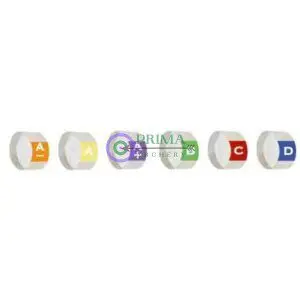
Choose between our new Clarifying Lens A-, our Clarifying Lens A, Clarifying Lens A+, Clarifying Lens B, Clarifying Lens C or Clarifying Lens D. To help determine the best clarifier for your needs, please refer to the table below. For more help and instructions, please click on the blue icons above.
Installation-
The InSight Peep System Instructions:
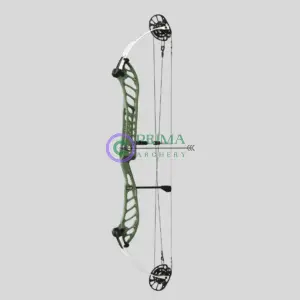
The InSight™ Peep System is made up of four main pieces including the light baffling peep housing, clarifying lens, aperture, and the aperture tool. There are 6 aperture sizes ranging from 1/32” up to 5/32” as well as 4 different clarifier lens strengths to accommodate a wide range of shooting setups. The peep housing can be used with or without a clarifying lens and has two sets of string grooves to better accommodate a wider range of shooters. We recommend installing/removing the apertures using the Hamskea Aperture Tool to avoid possible damage to the aperture.
Installing a Clarifying Lens into the Hamskea Insight™ Peep System

- In order to install an aperture and clarifier lens into your InSight™ Peep Housing, you will want to select the specific aperture and clarifier lens that best fits your needs using the reference selection chart below and lay them in order with the aperture tool shown in Picture 1.
- You will then want to place the aperture on top of the Hamskea Aperture Installation tool so that both are vertically in line as shown in Picture 2.
- When placing the clarifier lens within the raided edge of the aperture, you will want to align the letter of the lens with the slot in the aperture as shown in Picture 2. Aligning these will help to consistently orient/co-register the lens every time it is installed.
- The final step is to install the clarifying lens and aperture vertically into the peep housing using the tool to tighten until snug as shown in Picture 3. The aperture should thread in smoothly without the lens becoming bound on the edges of the housing. The peep sight must be held vertically during the installation to prevent any possible damage to the lens.
Warning: If the aperture works loose during shooting, you must reinstall the lens/aperture combo starting at step 1.
- NOTE: If this installation procedure is not followed, damage may result to any of the components of the InSight™ peep system and will not be covered under warranty.
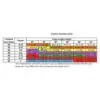
InSight™ Peep Clarifying Lens Selection Instructions:
- Determine your peep to sight/scope length. If you do not know this dimension, a close approximation will be your draw length.
- Using the table below, identify the column that most closely matches the value from the previous step.
- Identify the row that corresponds to your scope lens magnification (2x, 3x, 4x, etc.) and follow that row until it intersects with the column from the previous step. The letter in that intersection table entry will be the recommended clarifying lens (A, B, C or D).


Reviews
There are no reviews yet.